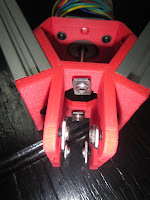
- Tap your extrusions.
- Pre-thread your T-nuts.
- Slide the triangles together
- The plastic brackets are rather stiff (by design, of course), so the only way to get the extrusions assembled is to insert all of them at once.
- Place the three vertices rounded-side-up (make sure they're all the same vertex - motor or idler!) in a rough triangle.
- Place the extrusions between them. Both extrusion and vertex are 60mm tall
- Insert the extrusions up to the first t-nut on all triangles.
- Slowly bring the three brackets together, sliding all three extrusions into all three brackets simultaneously. You'll need to orient all the T-nuts properly as you approach the two rear nuts.
- When the extrusions are almost home, insert screws into the end plates and screw into the holes you tapped previously.
- Screw in both extrusions on the bracket before moving to another bracket.
- Make sure that there are no gaps! After this step, the triangles should be rigid.
- Tighten the uppermost t-nuts on all brackets - use the ball ends.
- Flip the triangle carefully, then tighten the current uppermost t-nuts.
- Tighten the middle t-nuts from inside the triangle - it's a bit tight.
- Install the motors
 | ||||
| The screw in the center goes in first | ||||
| into the holes you tapped in step 1. | ||||
That's it for step 1. At the end, you should have two rigid triangles, one with motors and one with holes for the idler slider. Step 2 will install the openrail towers, completing the frame for the machine.


No comments:
Post a Comment